
Tutorials
 Rainbow
The Texture
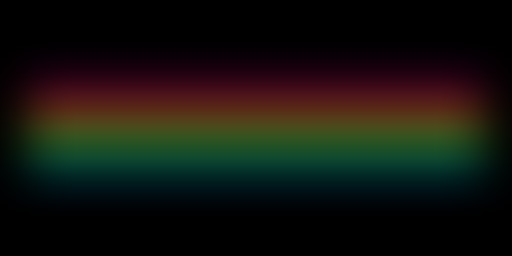
First you create an image (Paint does the job here) with the size of a texture (here: 256x512), by drawing straight lines (hold down Shift) in colors of a rainbow. (You can see the order by looking closely at real pictures of rainbows)
Important: Center the lines and make sure they have he same distance to each other!
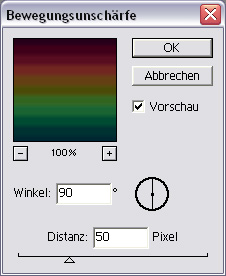
Then you open the image in a "better" image manipulation program. I used Photoshop and the blur filter "Motion Blur": twice at 0 degrees (with 50 pixel disort) and twice at 90 degrees (again 50 pixel disort).
Save it all as a Baseline - Standard ".jpg" and the texture is ready.
The Shader
Now you just have to equip the texture with a shader.
| textures/meinemap/regenbogen | // Name of the texture (in Radiant) |
| { | |
| q3map_nolightmap | // No shadows on the texture |
| surfaceparm nolightmap | // No shadows on the texture |
| surfaceparm nonsolid | // Makes it non-solid |
| surfaceparm nonopaque | // Transparency |
| surfaceparm nomarks | // No weapon marks |
| surfaceparm trans | // Transparency |
| cull twosided | // Patch is visible from both sides |
| { | |
| map textures/mymap/rainbow | // Path of the texture |
| blendFunc GL_ONE GL_SRC_ALPHA | // Transparency |
| rgbGen const ( 0.5 0.5 0.5 ) | // Less saturated colors |
| alphaFunc GE128 | // Filters out black |
| alphaGen const 1.0 | // Alpha channel property |
| } | |
| } |
Texture and shader are now packaged into a .pk3 and moved to GameData/Base/.
Important: Dont forget the entry in the shaderlist.txt ( Base/shaders)!Ingame
To put the rainbow into a map, just make a big patch and apply the rainbow texture (press Shift+S and click on "Fit" to strech the texture). Now just disort (press V, then manipulate) and move it to the right place.
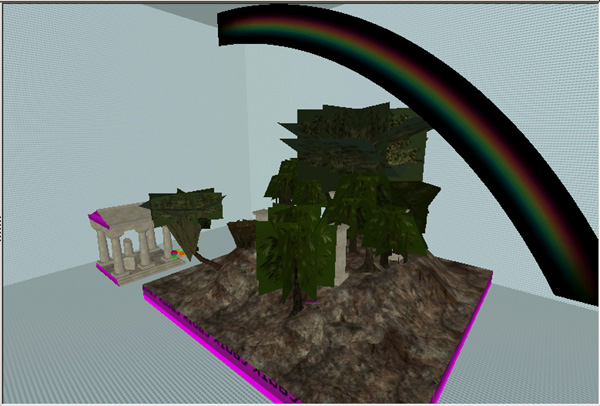
Now, that we have the rainbow in the map, lets compile (see: Q3map2GUI tutorial).

Comparison:
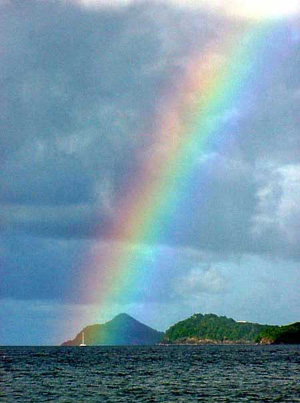
Have Fun!

